Simple Calculator
Setting up
We are going to be building a simple calculator to familiarise ourselves with the basic features of formation studio. Assuming you already have formation studio installed on your machine (if not, see Installation instructions) fire up the studio in the terminal as shown below.
formation-studio
Creating the design
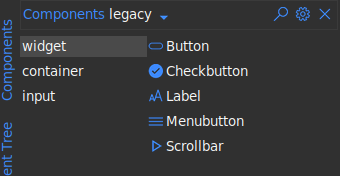
A blank design will open up assuming you are using default settings. On the
components pane on the top left, select legacy on the drop down menu
to use classic tkinter widgets and not themed ttk widgets. This will allow
us to customize more attributes.
On the vertical tab on the left, select widget and drag one Button and
one Label to the design pad.
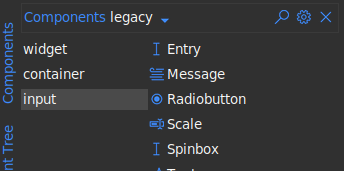
Now select input on the vertical tab to access
a new set of widgets and drag one Entry to the design pad.
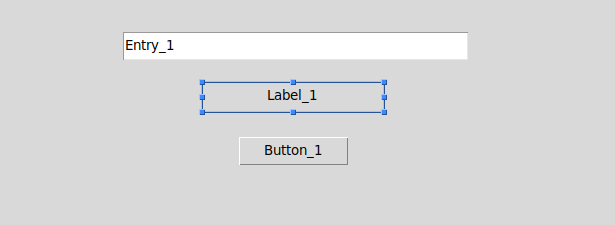
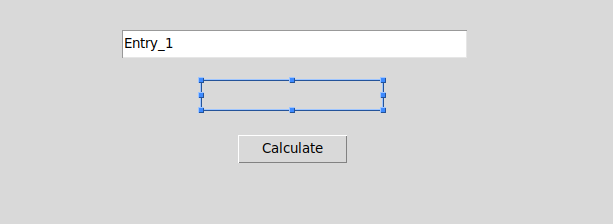
Arrange them as you please and you should have something as shown below.
Note
To move a widget around in the editor you will need to hold the shift key down when dragging. Alternatively you can move the cursor to the edges of the widget after selecting it and drag when the “hand” cursor appears. To resize a widget, drag the small squares at the edges and corners
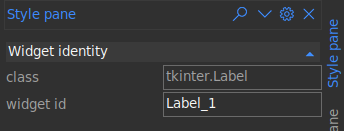
We now set the widget id of these widgets. This is the most important part
since this is the same id you will use to access the widget in your program. To
set the widget id use the style pane on the right. The option will always be at
the top in the widget identity section
For the purpose of this tutorial, set the widget id for the widgets added
above as follows
For the Entry widget set
widget idto exprFor the Label widget set
widget idto resultFor the Button widget set
widget idto calculate
Double click the Label and the Button and change the texts as shown below.
Leave the label blank since we will display the results of the calculations
here.
Alternatively, you can use the style pane to set the text attribute along with other style options you deem fit. The style pane as a whole is divided into 3 main parts
Widget identity : contains the class and the id of the widget
Layout : contains options that control the positioning the widget within its parent.
Attributes : contains options that control the style and other aspects of the widget
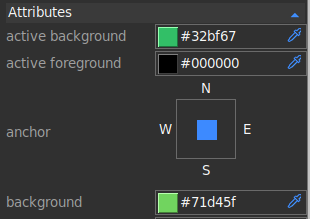
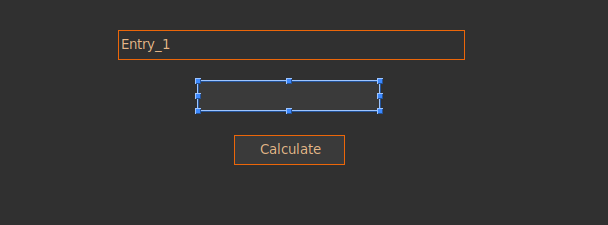
Play around with the styles to achieve your desired look. Try changing the colors and fonts. The design can look however you want.
Note
When selecting color, you can use the dropper on the right to select color from anywhere on your screen. The colored box on the left can be used to bring up the color picker to allow you more fine-grained control over the color. You can also type your desired color name directly on the color entry box.
Connecting Variables
To access values from our Entry we will need to connect a variable to it. We
can then access the value contained in the entry through the variable.
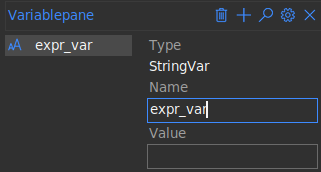
To add a variable, on the right edge of the studio, select Variablepane. A
new tool pane will open. Click on the “plus” icon at the top right and select
String on the drop down menu. A new String variable will be created as
shown below. Set the name to expr_var. Once again, this is an important value
and will be used to access the variable in your program.
Now select our Entry widget in the design pad and search through the
attributes section of the stylepane for the textvariable option. We
have only created one variable named expr_var so select that.

Note
Once a variable has been created in the VariablePane it can be connected
to multiple widgets through the variable and textvariable options allowing
you to control the value in multiple widgets with just one variable.
Connecting Commands
There are two ways of connecting commands in formation studio. We’ll start with the easiest one
Note
Pick only one of the methods below (preferably the first one) since they basically do the same thing in different ways. The second method is more advanced and can be used to achieve more complex bindings.
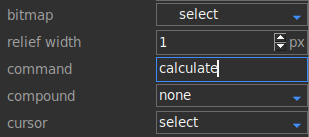
1. Using the command option
This is the easiest method. It is however limited and can only bind click events to
buttons and other widgets with the command option. To bind a command, simply
enter the name of the function to be called when the calculate Button is
clicked. This is the same name we will use when defining our callback function
so for the sake of the tutorial lets call it calculate
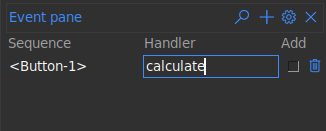
2. Using event bindings
This method can be used to bind all sorts of events since it uses tkinter’s bind
method under the hood. The binding is done pretty much the same way. To bind first
select the calculate Button then open the Eventpane from the right
edge of the studio. Click the “plus” icon at the top right of the pane to add a
new event binding. Then fill out the Sequence and
Handler as shown below.
Wrapping up the design
Save the design file as calculator.xml by doing any of the following
Go to main menu
File > SavePress
Ctrl+SClick on the “Floppy disk” icon in the tool bar
Writing the code
In the same folder where calculator.xml is saved, create a python file
named calculator.py.
To load our design file we will need to import formation loaders and load calculator.xml as shown below.
We will use AppBuilder which will create a toplevel window for us.
If you wanted to only load a section and code the rest of the app yourself you
would use Builder instead.
from formation import AppBuilder

app = AppBuilder(path="calculator.xml")
Now let’s define our calculate function which we are to link to the app. This
function will be called when the calculate Button is clicked
def calculate(event=None):
    # event parameter needs to be there because using the bind method passes an event object
    # access the expr_var we created earlier to determine the current expression entered
    expr = app.expr_var.get()

    # evaluate the expression
    try:
        result = eval(expr)
    except Exception:
        # if the expression entered was malformed and could not be evaluated
        # we will display an error message instead
        result = "Invalid expression"

    # display the result
    app.result.config(text=result)
We will now connect the calculate function to our app
app.connect_callbacks({"calculate": calculate})
Alternatively, since the function is in the global scope, you can connect it
directly using python’s globals() function
app.connect_callbacks(globals())
Now everything is done we can fire app our app’s mainloop to get the app running
app.mainloop()
Wrapping it up
The complete code to run our app which will be located at calculate.py will be
 1from formation import AppBuilder
 2
 3app = AppBuilder(path="calculator.xml")
 4
 5
 6def calculate(event=None):
 7    # event parameter needs to be there because using the bind method passes an event object
 8    # access the expr_var we created earlier to determine the current expression entered
 9    expr = app.expr_var.get()
10
11    # evaluate the expression
12    try:
13        result = eval(expr)
14    except Exception:
15        # if the expression entered was malformed and could not be evaluated
16        # we will display an error message instead
17        result = "Invalid expression"
18
19    # display the result
20    app.result.config(text=result)
21
22
23app.connect_callbacks(globals())
24
25app.mainloop()
You can now run calculator.py and it should display your beautiful working app. Type
a simple mathematical expression in the entry box and click “calculate” and it should display the
computed result

Conclusion
This was a simple example to get you started. You can learn to build more complex applications using the vast number of widgets available with just about the same ease as building the one in this tutorial. You can find the detailed API reference for formation loaders used above in the Loading a design section.