Creating a Canvas and using events to draw dots
Setting up
We are going to build a simple application. It will create a GUI with a large py:tkinter.canvas Using the an event defined in formation-studio, dots will be drawn onto the Canvas With one of the two buttons on the GUI, a simple “falling motion” of the dots will be simulated Assuming you already have formation studio installed on your machine (if not, see Installation instructions) fire up the studio in the terminal as shown below.
formation-studio
Creating the design
A blank design will open up assuming you are using default settings. On the
components pane on the top left, select legacy on the drop down menu
to use classic tkinter widgets and not themed ttk widgets. This will allow
us to customize more attributes.
On the vertical tab on the left, select widget and drag two times a Button to the design pad.
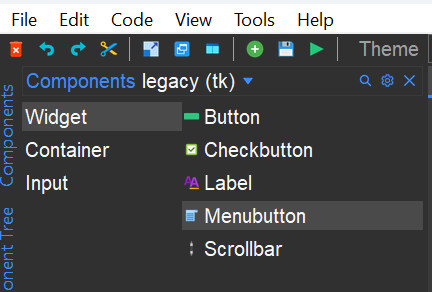
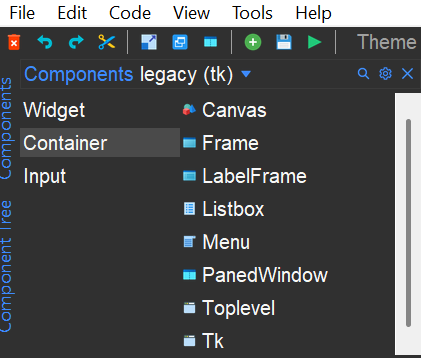
Button is located in the widget section. Canvas is located in the container section.
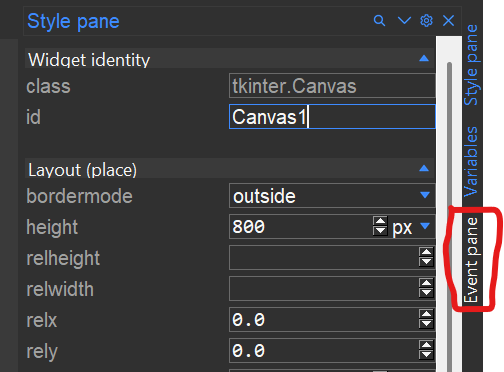
In the style pane, while the canvas is selected, make some adjustments:

Set the size of the Canvas to Height=800 and Width=1400. Adjust the size of the application window if required.
Change the ID to Canvas1, that is important to reference it in the python application.
If needed, change the background color of the Canvas to make it clearly visible
Note
To move a widget around in the editor you will need to hold the shift key down when dragging. Alternatively you can move the cursor to the edges of the widget after selecting it and drag when the “hand” cursor appears. To resize a widget, drag the small squares at the edges and corners
When selecting one of the 2 Button widgets, make the following adjustments in the Style Pane:
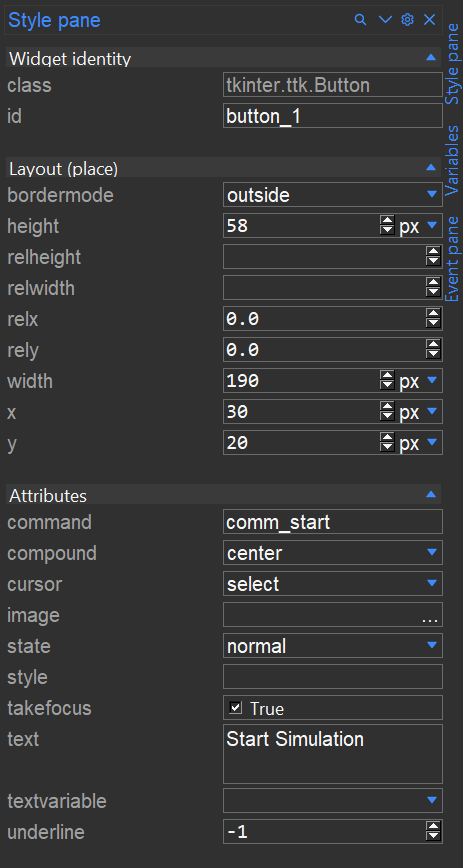
Change it text to Start simulation, and change its command to comm_start
Repeat this for the other button, changing its text to Stop Simulation and its command to comm_stop
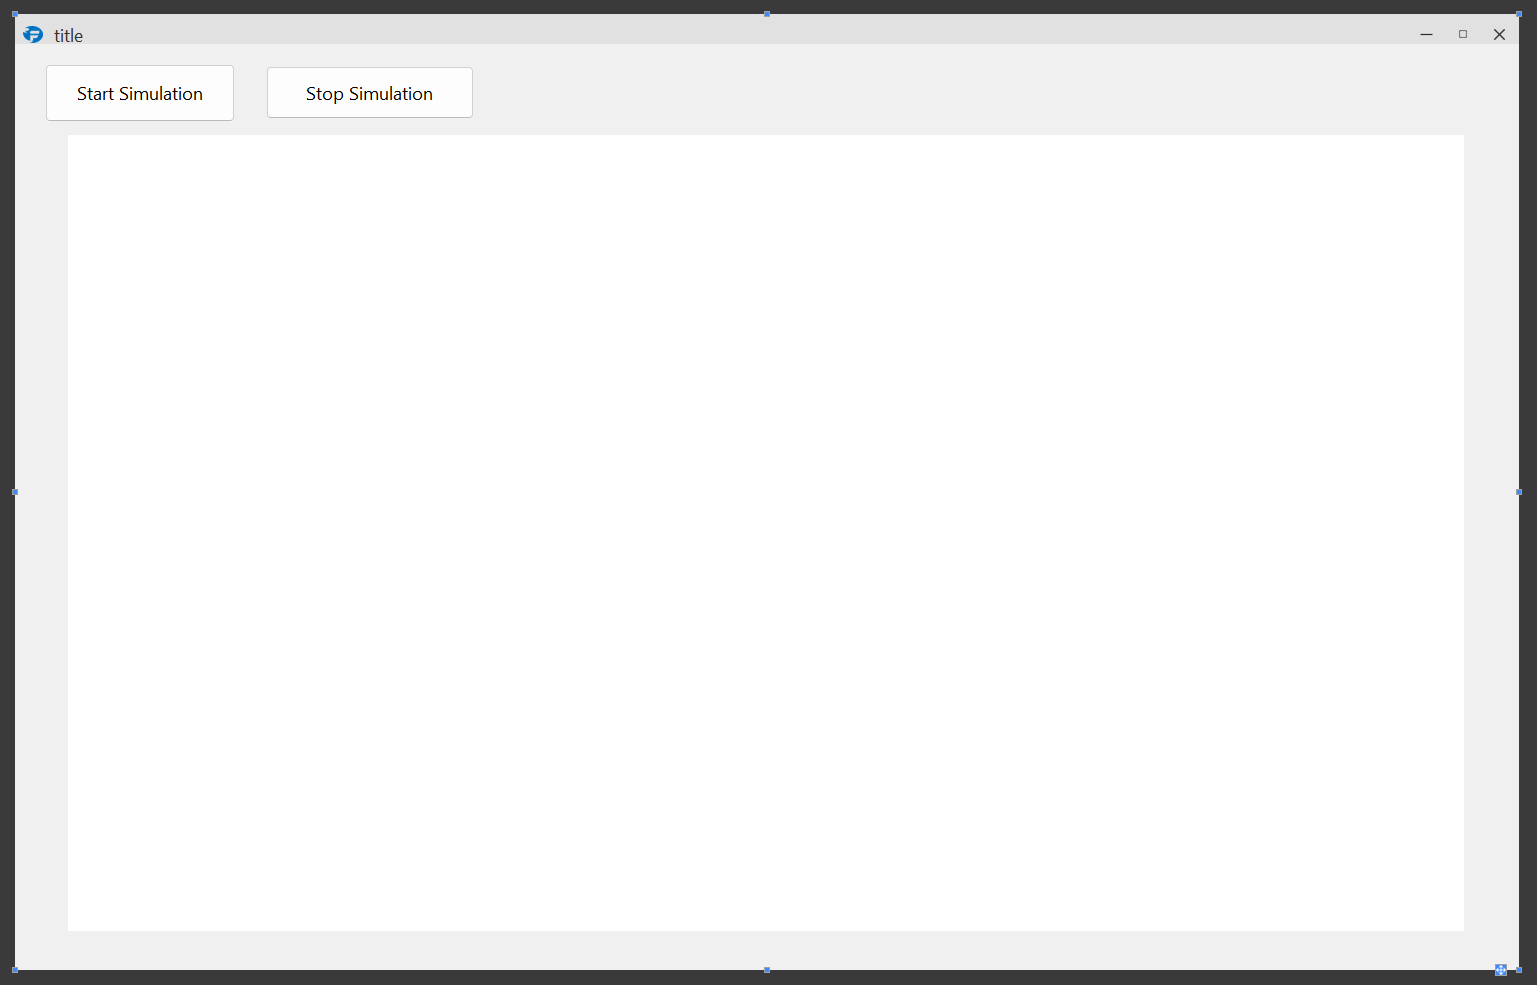
The total design should look like:
Next, we are going to create an event. This event is triggered when Mouse Button 1 is pressed inside the Canvas. Go to the Event-pane on the left of Formation Stuidio. If it is not open yet, click the Event Pane text on the far left-top
The Event Pane opens below the Style Pane, and looks like this:

Make sure you have selected the Canvas in the design window.
The Events that are added in the Event Pane are related to the selected design item in the main window.
Each Event consists of 2 items, the sequence and the handler.
The sequence is about the possible user interactions that can occur.
A partial list of possible events, and their meaning, is below. These are TKinter specific, more documentation on these events can be found on the Tkinter documentation.
- <Button-1>, <Button-2>, <Button-3>
Button 1 is the leftmost button, button 2 is the middle button(where available), and button 3 the rightmost button. These events are related to the correseponing pressing of the mouse buttons
- <B1-Motion>
The mouse is moved, with mouse button 1 being held down (use B2 for the middle button, B3 for the right button).
- <ButtonRelease-1>
Button 1 was released. This is probably a better choice in most cases than the Button event, because if the user accidentally presses the button, they can move the mouse off the widget to avoid setting off the event.
- <Enter>
The mouse pointer entered the widget (this event doesn’t mean that the user pressed the Enter key!).
- <Leave>
The mouse pointer left the widget.
- a
The user typed an “a”. Most printable characters can be used as is. The exceptions are space (<space>) and less than (<less>). Note that 1 is a keyboard binding, while <1> is a button binding.
Connecting Events
For this example, we will connect a function to a <B1-Motion> event for our Canvas1.
The name of the function we will assign is paint.
In the Event Pane, use the small green (plus) to add a Sequence and a Handler.
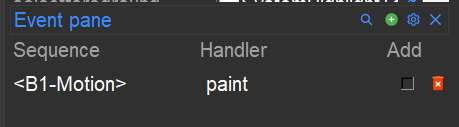
For Sequence fill in <B1-Motion> (including the smaller-than and larger-than characters).
For ‘Handler’ fill in paint. This is the name of the function that a <B1-Motion> event will triggered.
The Event Pane should look like this:
Wrapping up the design
Save the design in formation-studio in a filename called: Canvas_example.json by doing any of the following
Go to main menu
File > SavePress
Ctrl+SClick on the “Floppy disk” icon in the tool bar
Writing the code
In the same folder where Canvas_example.json is saved, create a python file
named Canvass_example.py.
To load our design file we will need to import formation loaders and load Canvas_example.json as shown below.
We will use AppBuilder which will create a toplevel window for us.
We also need to use the Threading module, to control the animation that will be created
We also need the :py:class:’sleep’ from the time-module.
from formation import AppBuilder
from time import sleep
import Threading

app = AppBuilder(path="Canvas_example.json")
app.connect_callbacks(globals())
First we need to define a number of variables. This is possible in formation-studio, but we need some specific type of variables.
app.listofdots=[]  ### an empty list for the dots
app.stop_event = threading.Event()  ## a stop-Event
The listofdots variable is of type list. It is created as part of the class app, which makes it basically a global variable.
The stop_event variable is of the type Event from the Threading. By making this part of the class app it is also a global variable.
Now, we need to define 3 functions, one for each of the two Buttons and one for the <B1-Motion> event that was defined on the Canvas1.
First, the start button:
def comm_start():
    app.stop_event.clear()
    app.move_thread = threading.Thread(target=dotsfall)
    app.move_thread.start()
return
The start button command does 3 things:
Clear the stop_evet, just in case it was already stopped
Create a Thread, referring to a function called
dotsfallStart the Thread that was just created
Note
Tkinter, and with that also Formation.Appbuilder and Formation-studio are event-driven applications. To have a continuous
flow or execution of a certain funcion, Threading is required. If a much mode simple :py:class: while loop is used, the
rest of the application will get into lockout and become unresponsive until the while loop ends
The stop button function looks like this:
def comm_stop():
    app.stop_event.set()
return
It does only one thing, which is raising the stop_event flag.
Next is the paint function, which is linked to the <B1-Motion> event on the Canvas:
def paint(event):
    python_green = "#476042"
    x1, y1 = (event.x - 1), (event.y - 1)
    x2, y2 = (event.x + 1), (event.y + 1)
    ID=app.Canvas1.create_oval(x1, y1, x2, y2, fill=python_green)
    app.listofdots.append([ID,1])
return
The paint function is called, and the event-variable is included in the function call.
Within the function, a couple of things happen:
we define a color, called
python_greenTwo coordinates (x1 and y1) for the top-left position of the dot that will be drawn are determined. This is just 1 pixel left and 1 pixel above the coordinates where the user is clicking in the
CanvasTwo coordinates (x2 and y2) for the bottom-right position of the dot, just 1 pixel right and 1 pixel below the mouse-click
Create a circle (Tkinter.Canvas.Create_oval)m with given 2 sets of coordinates (x1, y1, x2 and y2) and the color. This draws a dot approximately 3 pixels wide.
A list is created consisting of the ID-identifier of the Oval and a
speedindicator (=1). This 2-item list is added to the app.listofdots-list.
The list app.listofdots is used to control the movement of the dots using the dotsfall-function.
Note
When drawing on a Tkinter.Canvas, it is up to the creator of the application whether or not the item that has been drawn needs to be referenced again. Both of the following implementations are correct:
ID=app.Canvas1.create_oval(x1, y1, x2, y2, fill=python_green)
app.Canvas1.create_oval(x1, y1, x2, y2, fill=python_green)
In the first, the ID-identifier can (and in this example will) be used to reference the circle again. In the second implementation this is impossible, but in many cases also not required.
The dotsfall-function is the last to be defined. It is quite complex, so lets take it step by step. The following is the minimal-working function, although its effects are not entirely what we want.
def dotsfall():
    while not app.stop_event.is_set():
        for j in app.listofdots:
            ID=j[0]
            speed=j[1]
            app.Canvas1.move(ID,0,speed)
            speed+=1
        app._root.after(50)
    app._root.update()
    return
The follwing is happening:
A while-loop is created, which runs as long as the app.stop_event is not set.
Within the while-loop, there is a for-loop, going over the app.listofdots
Within the for loop, the ID of each Circle and the speed of each oval is read from the list
The corresponding Canvas1 item, the circles, are moved in Y+ direction (down)
The speed is increased by one.
After moving all objects on the Canvas1, the Threading event are temporarily stopped for 50ms, so that the GUI can be updated. Using app._root it is possible to directly address TKinter methods and functions
After the while loop, the total GUI is forced to be updated using app._root.update()
Some additional things need to happen during this function:
The app.listofdots list needs to be updated after movement. For this, a temporary, local second list is introducted: listofdots2
In case of a large number of dots, the stop_event needs to break the for-loop
In case of a large number of dots, the app._root.after() needs to be shorter to keep the movement even.
The updated, total function looks like this:
def dotsfall():
    listofdots2=[]
    while not app.stop_event.is_set():  ## continue movement until stop_event
        for j in app.listofdots:
            if app.stop_event.is_set():
                break
            ID=j[0]
            speed=j[1]
            app.Canvas1.move(ID,0,speed)
            speed+=1
            if app.Canvas1.coords(ID)[1]<800:
                listofdots2.append([ID,speed])
        app.listofdots=listofdots2
        if len(app.listofdots)>100:
            waittime=int(max(10,100-(len(app.listofdots)/2/1000)))
            time.sleep(waittime)
        else:
            time.sleep(0.050)
    app._root.update()
    return
Wrapping it up
You can download the full code below, of both the python code and the json-design file:
Conclusion
This was a simple example to show how events are linked to items in the GUI in formation studio.