Quick Start
Launch the studio from the commandline using the command
formation-studio
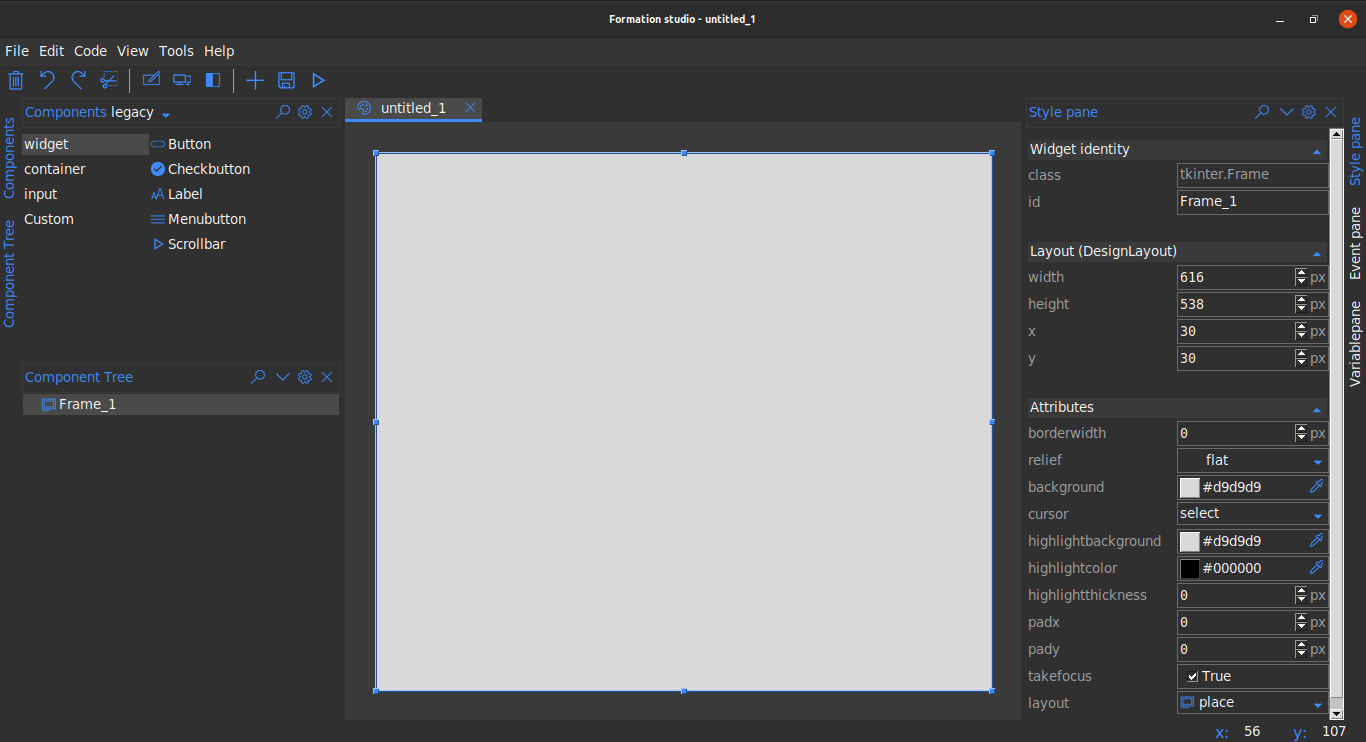
You can select widgets from the Components pane at the top and drag them onto the stage. Click to
select widgets on the workspace and customize them on Stylepane to the right. You can view
your widget hierarchies from the Component tree at the bottom left.
To preview the the design, use the preview (“run button”) on the toolbar.
After you are satisfied with the design, save by heading to the menubar _File > Save.
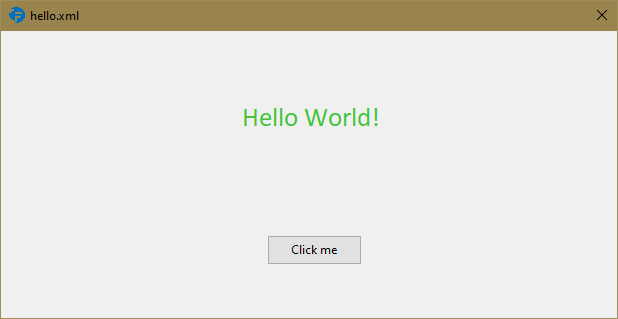
Below is a sample studio preview saved as hello.xml
The underlying xml uses namespaces and is as shown below:
<tkinter.Frame
    xmlns:attr="http://www.hoversetformationstudio.com/styles/"
    xmlns:layout="http://www.hoversetformationstudio.com/layouts/"
    name="Frame_1"
    attr:layout="place"
    layout:width="616"
    layout:height="287"
    layout:x="33"
    layout:y="33">
    <tkinter.ttk.Label
        name="myLabel"
        attr:foreground="#44c33c"
        attr:font="{Calibri} 20 {}"
        attr:anchor="center" attr:text="Hello World!"
        layout:width="539"
        layout:height="89"
        layout:x="41"
        layout:y="41"/>
    <tkinter.ttk.Button
        name="myButton"
        attr:text="Click me"
        layout:width="95"
        layout:height="30"
        layout:x="266"
        layout:y="204"/>
</tkinter.Frame>
Note
Note: this xml file has been manually formated to make it more legible but the actual xml file is minimally formatted since it’s not expected that the developer will need to modify the xml file manually
To load the design in your python code is as simple as:
# import the formation library which loads the design for you
from formation import AppBuilder

app = AppBuilder(path="hello.xml")

print(app.myLabel["text"]) # outputs text in the label 'Hello world!'
print(app.myButton["text"]) # outputs text in the button 'Click me'

app.mainloop()
Note
Note: Its advisable that you use widget names that are valid python identifiers to avoid possible issues while use the dot syntax to access the widget from the builder object. Use the widgets exact name as specified in the design to avoid AttributeError